|
|
|
Main News Forums Games Games Database Top 100 Release List Support Files Features Reviews Previews Interviews Editorials Diaries Misc Download Gallery Music Screenshots Videos Miscellaneous Staff Members Privacy Statement |
Page: 1 2 Tutorial: How to Create a Model
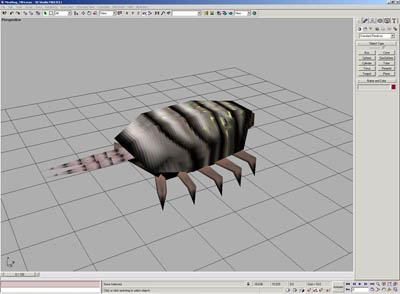
1. IntroductionThis tutorial describes the making of a 3D game figure from the mesh up to its in-game appearance; a meatbug will serve as an example. Having read the ZENGIN documentation for 3D models is one of the prerequisites, a certain knowledge of 3Dstudio Max and the Gothic script language the others. You'll need the following software:
2. Model exportLet's start with the necessary data for creating a new game figure. These are:
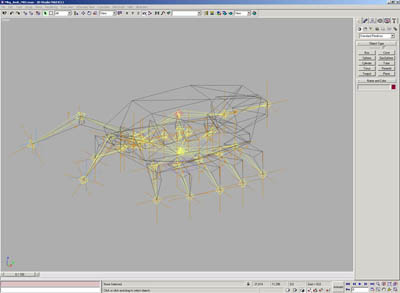
a) Fire up 3D Studio Max 3.1 and open the file MEATBUG_M04.MAX (you'll find it among the meatbug example files). This file contains the figure's skeletal structure as well as the visible mesh.
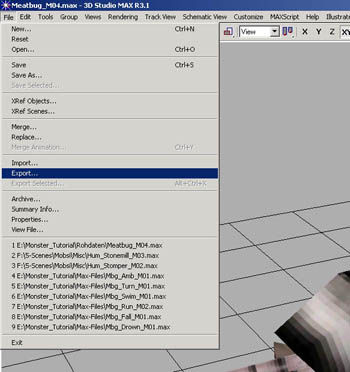
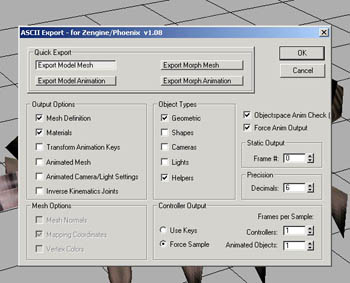
b) Now we'll export the model including its skeleton via the ZEN exporter. Select the Export... item from the File menu.
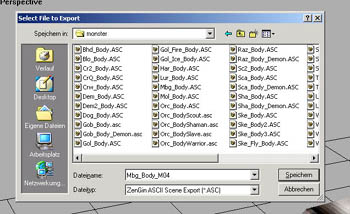
c) Select the ZEN Exporter from the following dialogue (ending *.asc). For saving the ASC file choose the subdirectory GOTHIC\_WORK\DATA\ANIMS as described in the ZEN documentation. You should create a folder called Meatbug there. Name the file to be exported Mbg_Body_M04.asc.
d) In the following dialogue, select Export Mesh via the quickbutton.
Now you have created the meshAndTree file necessary for MDS (we'll talk about MDS integration later).
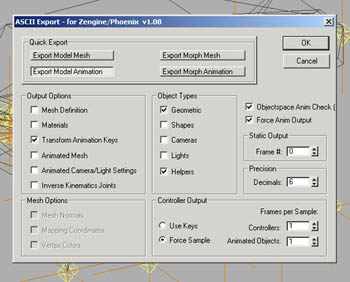
3). Animation exportOur figure needs animation data now so we can test it straight away. You'll start with the animation for ambient movement (idle/Ruhestellung), running (Run) and an animation showing how the figure will land on the ground (Fall). You need those because the figure - when inserted into the game - will be created in the air and then drops to the ground. If this animation phase is missing, the figure might get stuck and become uncontrollable. a) Load the file Mbg_Amb_M01.max in 3D Studio Max 3.1. This animation
is needed for the idle figure.
c) For export, select the same name you gave the MAX file, just with an .asc ending instead: Mbg_Amb_M01.asc. This way it will be easier for you to find the MAX file later on :-). d) Repeat steps a) to c) with the files: Now we have the necessary model and animation files for our new figure. Page: 1 2 |
|||||||||||
|
All original content of this site is copyrighted by RPGWatch. Copying or reproducing of any part of this site is strictly prohibited. Taking anything from this site without authorisation will be considered stealing and we'll be forced to visit you and jump on your legs until you give it back. |
||


